Saturday, August 30, 2014

The Laminate Vanity

When I found this little vanity at a yard sale, I scooped it up.  It was in pretty good shape.  The seat cover was old and dingy looking, but overall not too bad.
I was a little dissapointed that it was laminate and not real wood, but for the price, I thought I'd test out the chalk paint miricle on this piece.


First things first, I whipped up some of my homemade chalk paint with some existing paint I already had.

I painted the top and the drawer in this blue color.  I left the rest of the desk alone.  
The chair was another story.  I painted the upholstery on the chair with the same chalk paint mixture I had made for the desk.
See my tutorial here!
This was my first time trying to paint uphostery but I am wildly happy with the results.  No! It doesn't feel hard and crunchy like you would think.  It feels more like leather. :)


While the vanity desk was cute just as it was, I thought it needed something else.
I did a stensil on the top using the base of a cup and some acrylic paint that I found that matched up well. :)


Those holes you see are from an old mirror that was no longer with the desk.  I filled the holes, and glued a large tack that I had painted to match into each one.

Last step, I lined the drawer with some premium wrapping paper that I got a Pier 1 in their clearance isle.
I have used the mod-podge method in the past, but this time I used Elmers Spray Adhesive.  The stuff is sticky beyond belief, but for this little drawer it worked nicely.

 I gave the painted parts of this piece a coat of wax, (except for the cushion), and called it done.


This was one of the easiest projects I have taken on so far.  I was skeptical about using the homemade chalk paint on laminate, but it went on well and seems wonderful on it.

I am sure the new owners of this little vanity desk will enjoy it for quite a while. :)

Has anyone else had great results with painting laminate with chalk paint?

Monday, August 25, 2014

Cinnamon Roll Bread Pudding


Need I say more?  Of course this is amazing!  How could it not be? Cinnamon rolls made into bread pudding, I mean come on!

So have you ever gone into the store, and seen all those day old cinnamon rolls and doughnuts, usually marked down?
I had a super epiphany when my mom brought me home a day old cinnamon roll from her trip.
THIS THING WAS MASSIVE!
Probably a whole loaf of bread in one roll!
Anyways, I decided to take 1/2 of it and make it into a bread pudding.
This is amazing!  Probably the best idea I have had all year!


First Cube Your Cinnamon rolls...

Add your egg mixture...


Bake it and serve it with the special sauce!


(Right Click and Print this Recipe!)


mmmmm!

Hope you enjoy this as much as we did.  I am literally shoveling it into my face as I type! :)


Wednesday, August 20, 2014

Painting Upholstery With Chalk Paint

On a recent project, I discovered how easy it was to paint the fabric on furniture.

I had seen this done before, but I was hesitant to try it...
but it worked!  And it looked amazing!
With such great results, I thought I would share with you this easy method.

Here is the stool before:


It was dingy and a bit discolored.  The fabric itself however, was in good shape.

If you are planning on painting some fabric yourself here is what you will need:

*Spray bottle with water
*Foam brush
*Chalk Paint

Some of the other tutorials on this type of refinish call for fabric medium.  It's supposed to make your fabric softer.  I opted out of that because I didn't have any on hand and would have had to wait for it to come in the mail.  I was too impatient for that...

First start by spraying the fabric down with a spray bottle until the surface is covered nicely.  You do not want your fabric soaking wet, just wet enough to kind of loosen the fibers, and help spread the paint nicely.

Work in small sections.  I was able to do this entire stool at once because it was small.  If you are attempting a large chair, start with one section at a time.

Using your foam brush, paint the fabric just as you would normally paint.  It helps if you spray your foam brush down with water bottle every so often as you go back in for more paint.

I did 2 coats on this stool.  In between coats I used a 220 grit sheet of sandpaper to help make the next layer go smooth, and remove any debris.

The next day, I did my second layer, and it turned out wonderful.
The paint doesn't feel crackly, or crunchy.  It feels like a soft leather.  It does not come off onto your clothes. :) 


You truly cannot tell that it was painted this color.  It looks like the original color.
I'm sure that would vary on the type of fabric.

If you haven't tried this, I highly suggest it.  It will change the way you look at furniture. 


Sunday, August 17, 2014

Sweet Bathroom Wall Art


I was recently inspired by this fabulous bathroom art.

I decided to do a similar thing in my own bathroom.  I had a big empty space on one wall that I wanted to put a towel rack on.  But... procrastination what?
Anyways... when I saw her post, I changed my mind for this wall.


Because of the small amount of room in our bathroom, the angle is a little weird.  Sorry!

I simply took each child separately in the bathroom and had them sit on the bathtub so they would all be against the same backdrop, {my shower}.  I had them all take off their shirts, and place a white towel over their heads.  
Some of them were in the classic smile pose, while a few of them were being silly. 
I took plenty shots of each child and then chose my favorites.

Next, I changed the photos to the chocolate black and white in 
                                                     Photoshop Elements 12.

I bought a whole pack of these magnetic photo hangers at Michael's in the clearance isle for $2 for a pack of 10!
They are magnetic or they also have holes at the top for hanging.
I chose to hang mine with decorative tacks! ($2.00)

Photos: (5) 8x10 ...$6.00
Tacks...$2.00
Photo Sleeves... $2.00

Total for entire project ...$10.00!!!


I may end up changing these out into real frames, but for now the $2 struck my budget fancy!

What do you think?
What kind of bathroom wall art have you done with out spending big bucks?


Wednesday, August 13, 2014

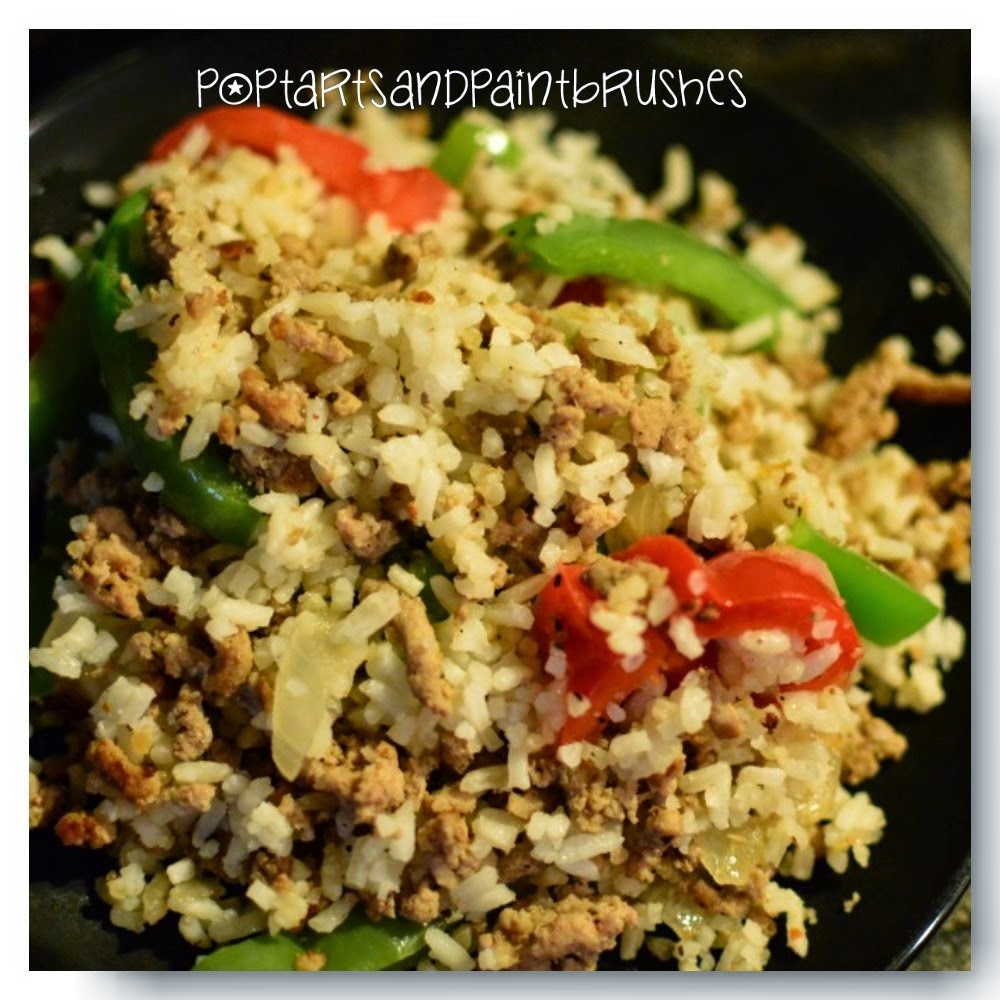
Almost Stuffed Bell Peppers


Well here is one of my hubby's favorites.  (He's a simple man...)
I call it un-stuffed bell peppers.  This is a very easy dish to make, and it feeds a whole lotta boys!
I know, I have 4 growing ones, not counting the hubs. 


I know it doesn't look like much but it's a crowd pleaser!  You can use whatever kind of ground meat you like.  I used ground turkey, but you can also use sausage, or any other type of ground meat.  Season your meat however you like.  I use just a bit of salt and pepper.


Yes it's that simple!

I hope you enjoy this little recipe as much as we do.  A quick and easy dinner! 
My kids like putting this on tortillas, while the hubby likes eating it just like this...


Aren't quick and simple dinners the best? ;)


Tuesday, August 12, 2014

3 Ingredient Cowboy Cobbler


This is a favorite in my house...  A delicious cobber made with only 3 ingredients.  Oh, and no butter!
This recipe was given to me a long time ago by my mother-in-law.
She showed me how to do this in a dutch oven, but I have been doing it in the regular oven, and it always turns out.
Start with the fruit of your choice.  I usually use blackberries. You can use fresh, frozen, or canned.
Add one box of cake mix over the fruit.  This can be yellow or white, any variety.  This time, I used white vanilla flavored, and it was lovely.  Do not mix. Just lay the fruit on the bottom, and then the cake mix over the top.
Next pour an entire can of lemon-lime soda or squirt evenly over the top.  
Cook it at 400 for about 40 minutes.
It should be golden brown and crispy around the edges.


Here is the recipe:


Easy as... Cobbler!  After you layer your 3 ingredients, GENTLY stir the fizzy soda in with the cake mix.  Don't try to mix it.  Just help it along a little. :)


Golden brown fresh out of the oven. :)  You can serve it with ice cream or whipped cream.


This is my go-to dessert. Everyone always loves it, and it takes absolutely no time at all.
Try it tonight!


What's the go-to dessert at your house?